Havis DS-DELL-301-3 Manual
Havis
Other computer accessories
DS-DELL-301-3
Read below 📖 the manual in Italian for Havis DS-DELL-301-3 (16 pages) in the Other computer accessories category. This guide has been helpful for 9 people and has been rated 4.5 stars on average by 2 users
Page 1/16

DS-DELL-300 Series
Havis Rugged Mobile Docking Station
For DELL XT2 XFR
Set-up Instructions
DS-DELL-300-OMN_0510
www.havis.com
1-800-524-9900
EnglishFrançaisDeutsch
Havis offers a wide variety of accessory products
specically for use with the DS-DELL-301 docking station.
For more information or to order please visit www.havis.com.
• DS-DA-101
USB powered, soft red LED
light illuminates your laptop
keyboard for night viewing.
• HUB-USB3-E
Rugged USB/Ethernet hub
makes adding peripherals to
your mobile workspace easy
and safe. Maximize your
productivity with the highest
quality solution on the market.
• CG-X
Auto Shut-Off Timer is an
easy-to-use intelligent vehicle
power management system
that prevents dead batteries,
protects electronics from volt
age anomalies, and gives you
peace of mind.
Havis is pleased to provide these set-up instructions to aid in the proper
installation and use of the DS-DELL-300 Series docking station for the DELL XT2
XFR laptop.
For questions regarding the set-up of your DS-DELL-300 Series docking station,
please contact Havis at 1-800-524-9900 or visit www.havis.com for additional
product support and information.
Before Beginning
WARNING
!
• NEVER STOW OR MOUNT THE DS-DELL-300 SERIES DIRECTLY IN A VEHICLE
AIRBAG DEPLOYMENT ZONE.
• DO NOT USE COMPUTER WHILE DRIVING.
www.havis.com • 1-800-524-9900
1 30
READ ALL INSTRUCTIONS THOROUGHLY BEFORE BEGINNING INSTALLATION.
CAUTION
!
Precautions
• Do Not Place Containers of Liquid or Metal Objects on Top of
The Docking Station
• If a Malfunction Occurs, Immediately Unplug the Power Supply and
Remove the Laptop
• Use Only the Specied Power Supply With This Docking Station
• Do Not Store The Docking Station Where There is a Lot of Water, Moisture,
Steam, Dust, Oily Vapors, etc.
• Do Not Connect Cables Into Ports Other Than What They Are Specied For
• Do Not Leave The Docking Station in A High Temperature Environment
(over 158° F) for a Long Period of Time
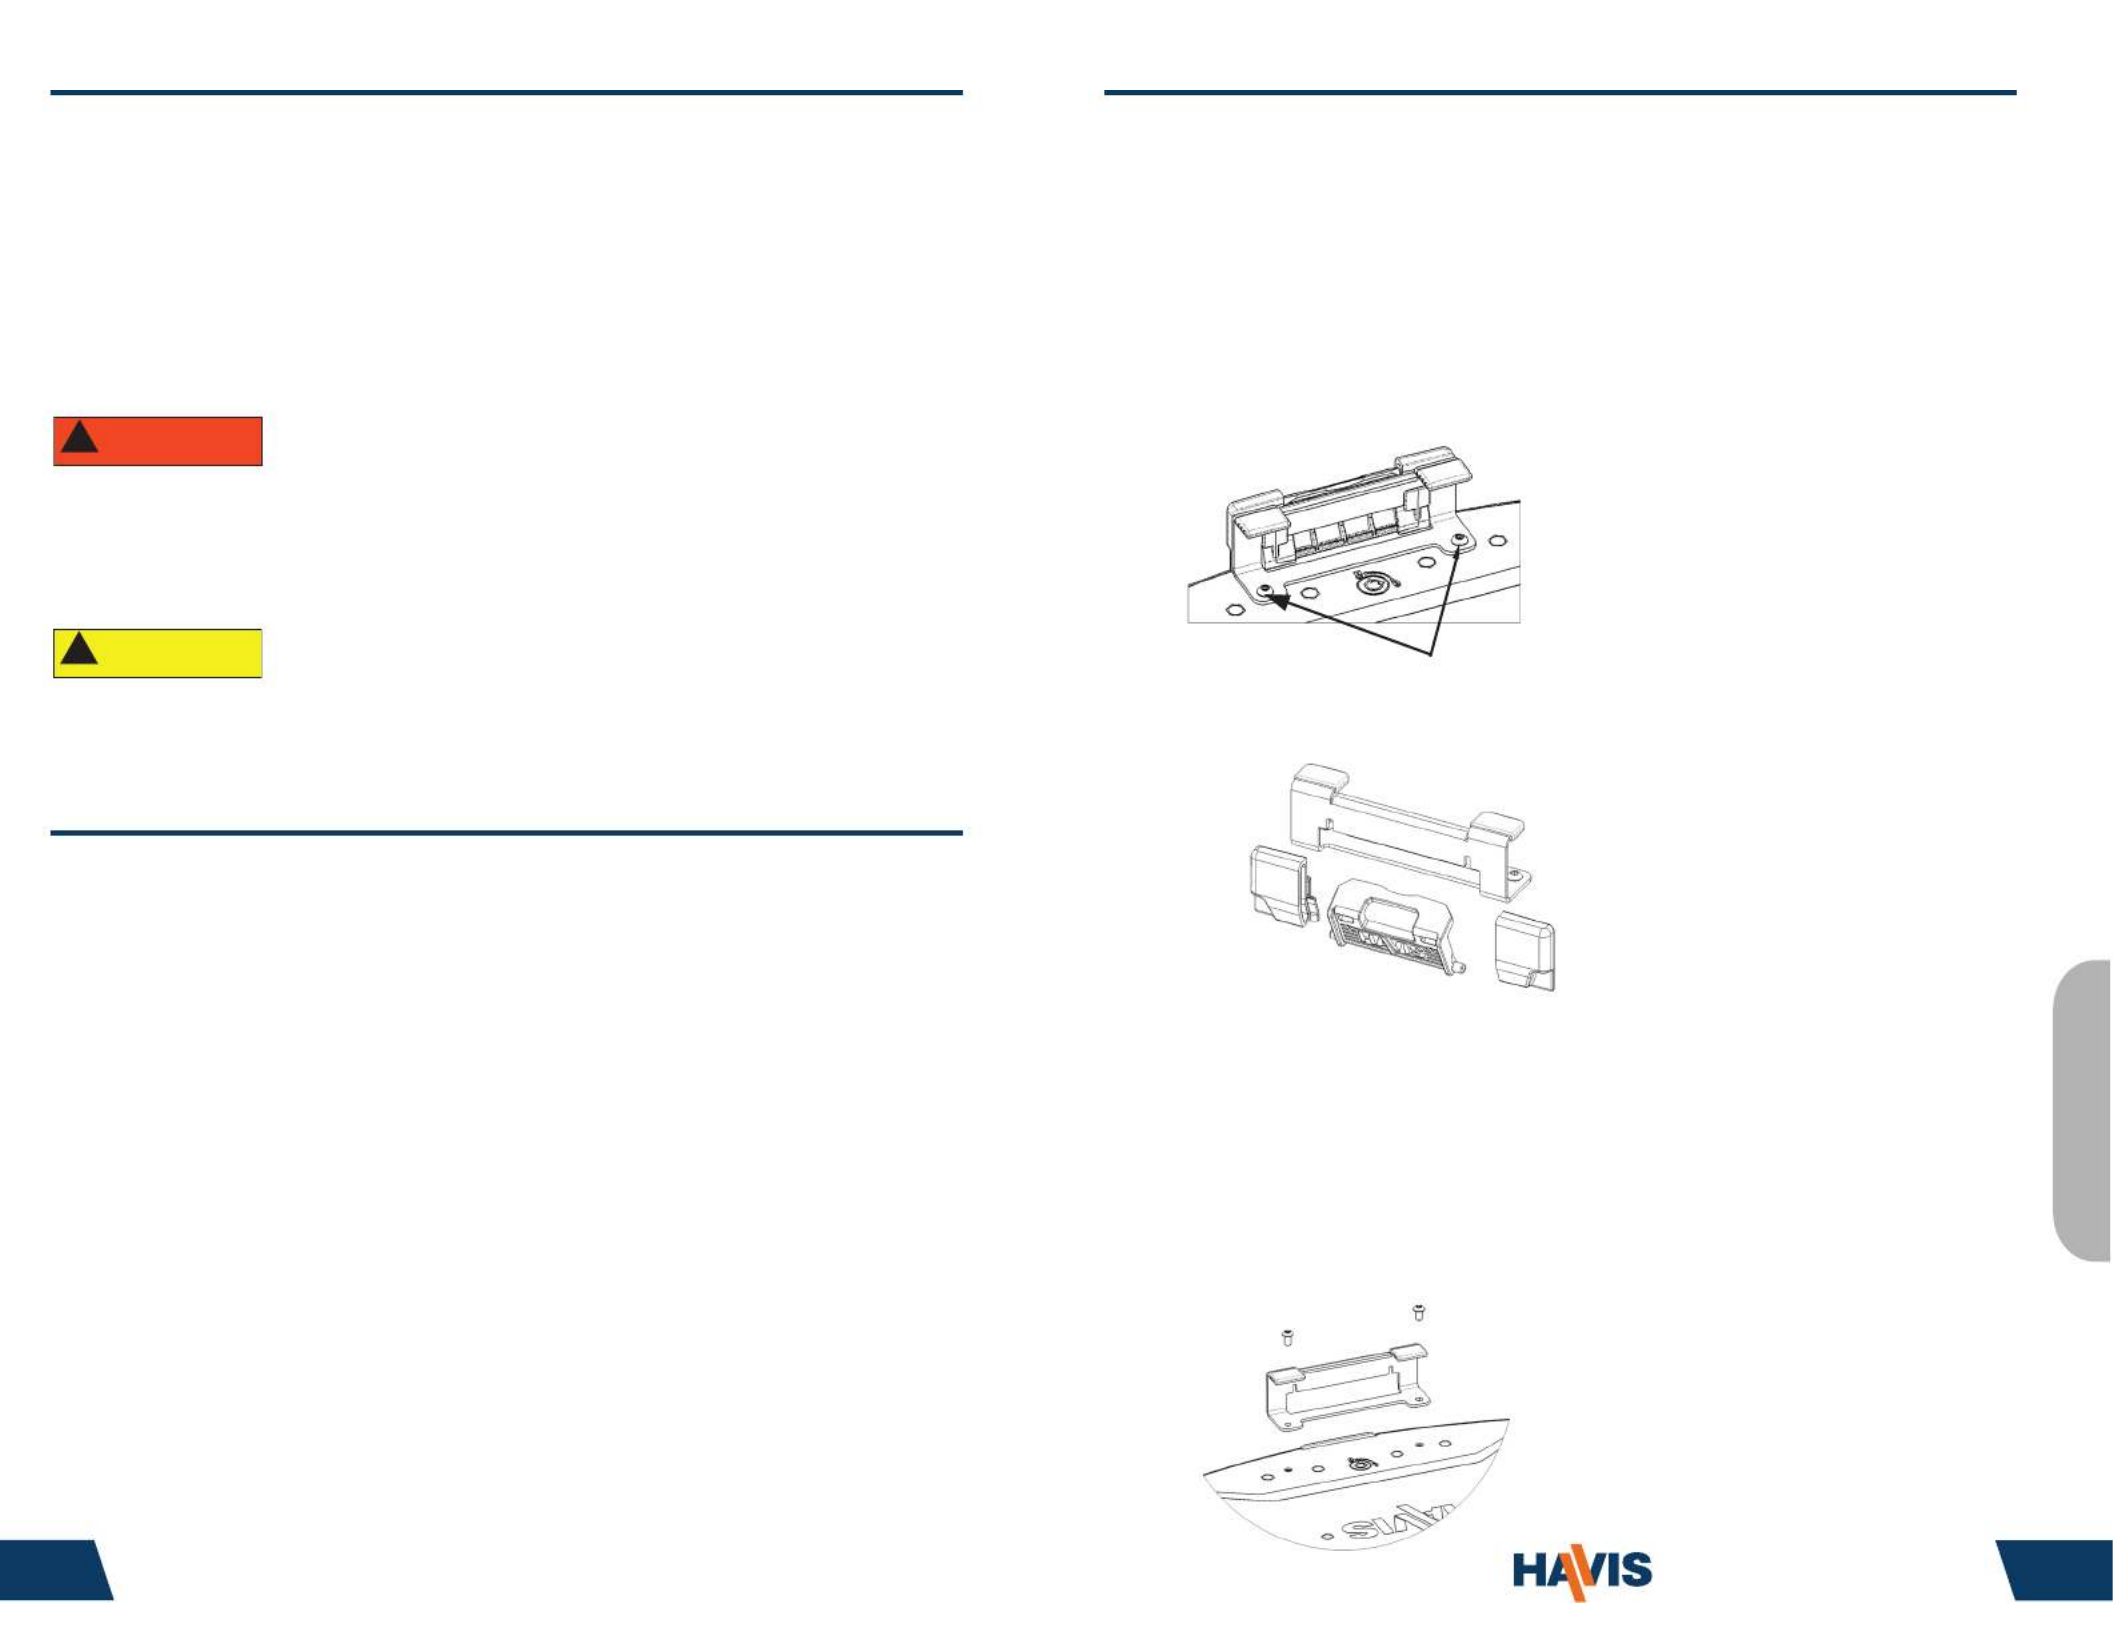
Betrieb – LCD-Klemme (Fortsetzung)
Entfernen der Klemme (optional):
Sollte der Gebrauch einer LCD-Klemme nicht erforderlich sein, kann
diese nach folgendem Verfahren entfernt werden.
1). Entfernen Sie den Computer aus der Docking-Station.
2). Mit einem 2,5 mm Sechskant entfernen Sie die beiden
Schrauben, mit denen der vordere Niederhaltebügel befestigt ist.
3). Schieben Sie die LCD-Klemme und die (2) LCD-
Klemmenführungen vom vorderen Niederhaltebügel ab.
4). Nun bringen Sie mithilfe der in Schritt 2 entfernten Schrauben
den vorderen Niederhaltebügel wieder an der Docking-Station an.
Mit einem 2,5mm Sechskant ziehen Sie die Schrauben auf 1,8 Nm
(16 in-lbs) ± 10% fest.
5). Nachdem Sie sichergestellt haben, dass die Kunststokappen
sich noch an dem vorderen Niederhaltebügel benden, können Sie
mit dem normalen Gebrauch der Docking-Station fortfahren.
HINWEIS:
Es ist ratsam auf die Gewinde der Schrauben
einen Tropfen von mittelstarkem (blau)
Gewinde-Adhäsiv aufzutragen.
Entfernen der (2) Schrauben
LCD-Klemmenführungen
Vorderer Niederhaltebügel
Deutsch
(Original Instructions)

Table of Contents
Hardware Kit.2
Name and Function of Parts3
Installation..4
Cable Management.5
Installation of Screen Stiener.6
Operation - Docking/Undocking.7
Operation - LCD Clip.9
Hardware Kit
The hardware kit includes:
1. Zip Ties (4)
2. Keys (2)
3. Zip Tie Mounts (2)
4. M4 Pan Head Screw (2)
5. 1/4” - 20 Button Head Screw (4)
6. M6 Button Head Screw (4)
www.havis.com • 1-800-524-9900
29 2
Tools Required For Installation:
• #2 Phillips Drive (For attaching zip
tie mounts to mounting bracket)
• 4 mm Hex Drive ( For attaching
mounting bracket to docking station
with M6 Screws )
• 5/32” Hex Drive ( For attaching
mounting bracket to motion device
with 1/4” -20 screws)
1
2
3
4
5
6
Betrieb – LCD-Klemme
Einrasten der Klemme:
1). Nach Dockung des Computers sollte die LCD-Klemme dazu
benutzt werden, die LCD, wenn geschlossen oder im Tablet-
Modus, zu sichern.
2). Vergewissern Sie sich, dass die LCD zentriert ist und
uchteben gegen die Kunststokappen an dem vorderen
Niederhaltebügel sitzt.
3). Drücken Sie nach unten auf die LCD-Klinke, bis diese gegen
den vorderen Niederhaltebügel durchschlägt.
4). Heben Sie die LCD-Klemme an und rotieren Sie die Klemme
über die LCD-Klinke am Computer bis sie einrastet.
Ausrasten der Klemme:
1). Sie müssen die LCD-Klemme anheben und durch Rotieren außer
Eingri bringen, bis die LCD aus der Verstauungs- bzw. Tablet-
Position gehoben werden kann. Beim Ausrasten der LCD-Klemme
darf nicht übermäßige Kraft ausgeübt werden, da sonst Schäden
auftreten könnten.
Verstaute Position Eingerastete Position
Von dieser Kante aus anheben
Druck nach unten
LCD
2). Stellen Sie sicher, dass sich die LCD-Klemme zur Lagerung und
um das Risiko von Schäden möglichst gering zu halten in der
verstauten Position bendet.
English
Product Specifications
| Brand: | Havis |
| Category: | Other computer accessories |
| Model: | DS-DELL-301-3 |
Do you need help?
If you need help with Havis DS-DELL-301-3, ask a question below and other users will answer you
Other computer accessories Havis User Manuals

15 October 2024
15 October 2024
15 October 2024
15 October 2024
15 October 2024
15 October 2024
15 October 2024
15 October 2024
15 October 2024
15 October 2024
Other computer accessories User Manuals
- Other computer accessories Panasonic
- Other computer accessories Goobay
- Other computer accessories StarTech.com
- Other computer accessories Origin Storage
- Other computer accessories Urban Factory
- Other computer accessories Gembird
- Other computer accessories Lindy
- Other computer accessories Digitus
- Other computer accessories Lenovo
- Other computer accessories Kensington
- Other computer accessories Manhattan
- Other computer accessories Rocstor
- Other computer accessories Vantec
- Other computer accessories Techly
- Other computer accessories ATen
- Other computer accessories Uncaged Ergonomics
- Other computer accessories Xcellon
- Other computer accessories Gamber-Johnson
- Other computer accessories Enhance
- Other computer accessories Apricorn
Latest Other computer accessories User Manuals
19 October 2024
17 October 2024
15 October 2024
15 October 2024
15 October 2024
15 October 2024
15 October 2024
15 October 2024
14 October 2024
14 October 2024